hexo博客配合typora快速搭建
hexo客户端安装
概述
- 仅写文章的客户端需要nodejs环境,最终deploy的是纯静态环境,故最终部署服务器无需部署nodejs
- 本例客户端用的debian12,windows类似,实际使用应该后者居多
- 最终部署为通过rsync上传到远程服务器
debian12下安装nodejs(windows下有该环境则直接填过)
1
2
3
4
apt update
apt install nodejs npm rsync -y
node -v
npm -v安装hexo
1
2
3
4
5
6
7
8
9
10
11
12
13
14
15
16
17
18
19
20
21
22
npm install hexo-cli -g
hexo init utf.cc
cd utf.cc
npm install
hexo s
访问测试 http://localhost:4000
站点基本配置
vi _config.yml
Site
title: UTF
subtitle: ''
description: ''
keywords:
author: 断章
language: zh-CN
timezone: ''
URL
# Set your site url here. For example, if you use GitHub Page, set url as 'https://username.github.io/project'
url: https://utf.cc图片相对路径插件
1
2
3
4
5
6
7
8
9
npm install hexo-asset-img --save
npm install hexo-renderer-marked --save
修改_config配置
vi _config.yml
post_asset_folder: true
marked:
prependRoot: true
postAsset: true
主题部署
安装butterfly主题
1
2
3
4
5
6
7
8
9
10
11
12
13
14
15
16
17
18
19
20
21
22
23
24
25
26
27
28
29
30
31
32
33
34
35
36
37
38
39
40
41
42
43
44在博客的主目录下执行后续命令
git clone -b master https://github.com/jerryc127/hexo-theme-butterfly.git themes/butterfly
config配置文件相关
cp themes/butterfly/_config.yml _config.butterfly.yml
将主题修改为butterfly
vi _config.yml
theme: butterfly
去掉butterfly的默认banner和底部的版权
vi _config.butterfly.yml
Disable all banner images
disable_top_img: true
card_author:
enable: true
description:
button:
enable: true
icon: fab fa-github
text: 关注我
link: https://github.com/chinkiang
card_announcement:
enable: true
content: 欢迎来到我的博客
--------------------------------------
Footer Settings
--------------------------------------
footer:
owner:
enable: true
since: 2025
custom_text:
Copyright of theme and framework
copyright: false
生成对应html
hexo gen
安装插件
npm install hexo-renderer-pug hexo-renderer-stylus --save
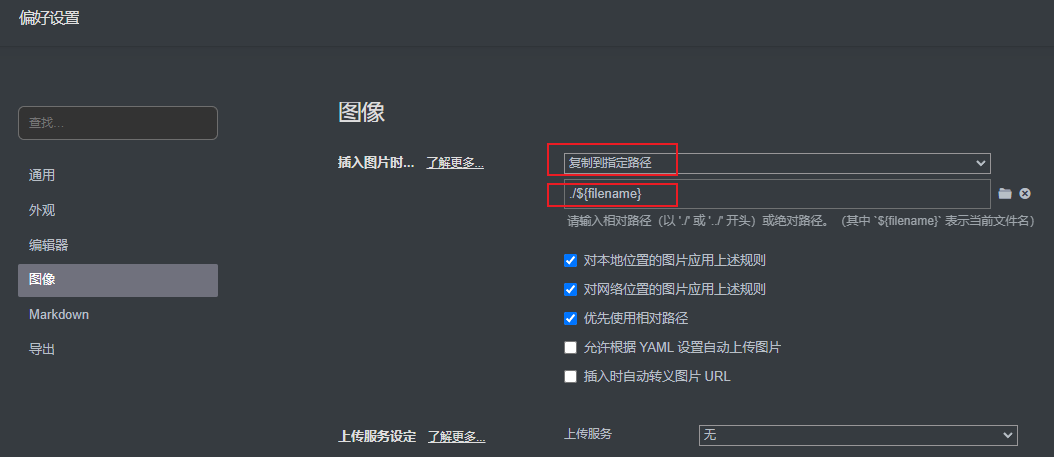
typora适配
图片相对路径配置
文章发布测试
1
2
3
4
5
6
7
8
9
10
11
12
13
14
15
16
17
18
19
20
21
22
23
24
25
26
27补充分类页面
hexo new page categories
type行增加:
type: categories
补充标签页面
hexo new page tags
type行增加:
type: tags
为分类和标签页生成index.html索引
hexo gen
最后的名称会出现在url中,故不要出现空格、引号和中文!
hexo new post duanzhang
标题设置在 --- title: 断章 --- 即可
如果是需要导入md文件,在源码加入如下header
---
title: hexo博客配合typora快速搭建
date: 2025-05-21 13:00:50
tags: hexo
categories: 技术
---
后续直接使用typora编辑./source/_posts/duanzhang.md即可
静态网页搭建
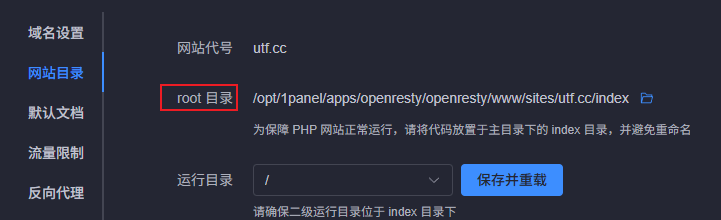
服务端直接1panel搭建一个纯静态网页即可,同时绑定域名,需记录下网页根目录
服务端安装rsync
1
apt install rsync -y
远程部署相关配置
1
2
3
4
5
6
7
8
9
10
11
12
13
14
15
16
17
18
19
20
21
22
23
24
25
26
27
28
29安装hexo-deployer-rsync插件
npm install hexo-deployer-rsync --save
和远程服务器配置ssh免密认证(windows下安装rsync可使用cwRsync_4.1.0_Installer,ssh免密逻辑类似)
如果本地已有公钥则跳过此步骤,一般在home下的.ssh目录
ssh-keygen -t rsa -b 4096
ssh-copy-id username@remote_host
ssh username@remote_host
补充原有的deploy选项
vi _config.yml
deploy:
type: rsync
host: 8.8.8.8
user: root
root: /opt/1panel/apps/openresty/openresty/www/sites/utf.cc/index
port: 22
args: --chown=root:root # 修复windows下用户组错误的问题,linux下删除该选项
delete: true # 是否删除目标目录中多余的文件
verbose: true # 显示详细日志
ignore_errors: false # 是否忽略错误
发布
hexo clean
hexo gen
hexo d # 如果报错,检查客户端和服务端是否都安装了rsync!
测试网址访问
https://utf.cc附windows下的rsync相关配置
安装cwRsync将bin目录加入环境变量并置顶,版本不能太老,实测4.1.0版本配置失败!
存在的问题: rsync后uid/gid错误,不是root,不影响功能
生成证书
1
2
3
4
5
6
7
8
9
10生成证书,一路回车
ssh-keygen.exe -t rsa
默认的证书路径: C:/Users/2/.ssh
将公钥文件(id_rsa.pub)上传到服务器目录下并追加到信任公钥列表
cat id_rsa.pub >> ~/.ssh/authorized_keys
chmod 700 ~/.ssh/authorized_keys
测试是否免密能否登录
ssh root@173.44.62.11
本博客所有文章除特别声明外,均采用 CC BY-NC-SA 4.0 许可协议。转载请注明来源 UTF!